1. Premiers pas¶
1.1 Ce qu'il vous faut¶
- Une cible Fastmark (voir le chapitre 2 pour les modèles).
- Un téléphone ou une tablette sous Android ou iOS, avec le Bluetooth activé.
- Une connexion internet pour le tout premier lancement de l'application. Ensuite, l'application fonctionne entièrement hors ligne ; internet n'est de nouveau nécessaire que pour se connecter à un compte et synchroniser vos résultats.
1.2 Installer l'application¶
Installez Fastmark Sport depuis l'App Store d'Apple ou le Google Play Store. Elle est gratuite.
À la première ouverture de l'application, le système d'exploitation demande l'autorisation d'utiliser le Bluetooth (et, sous Android, l'autorisation appareils-à-proximité/localisation qu'exige la recherche Bluetooth). Acceptez ces demandes — sans elles, l'application ne peut voir aucune cible.
1.3 Premier lancement¶
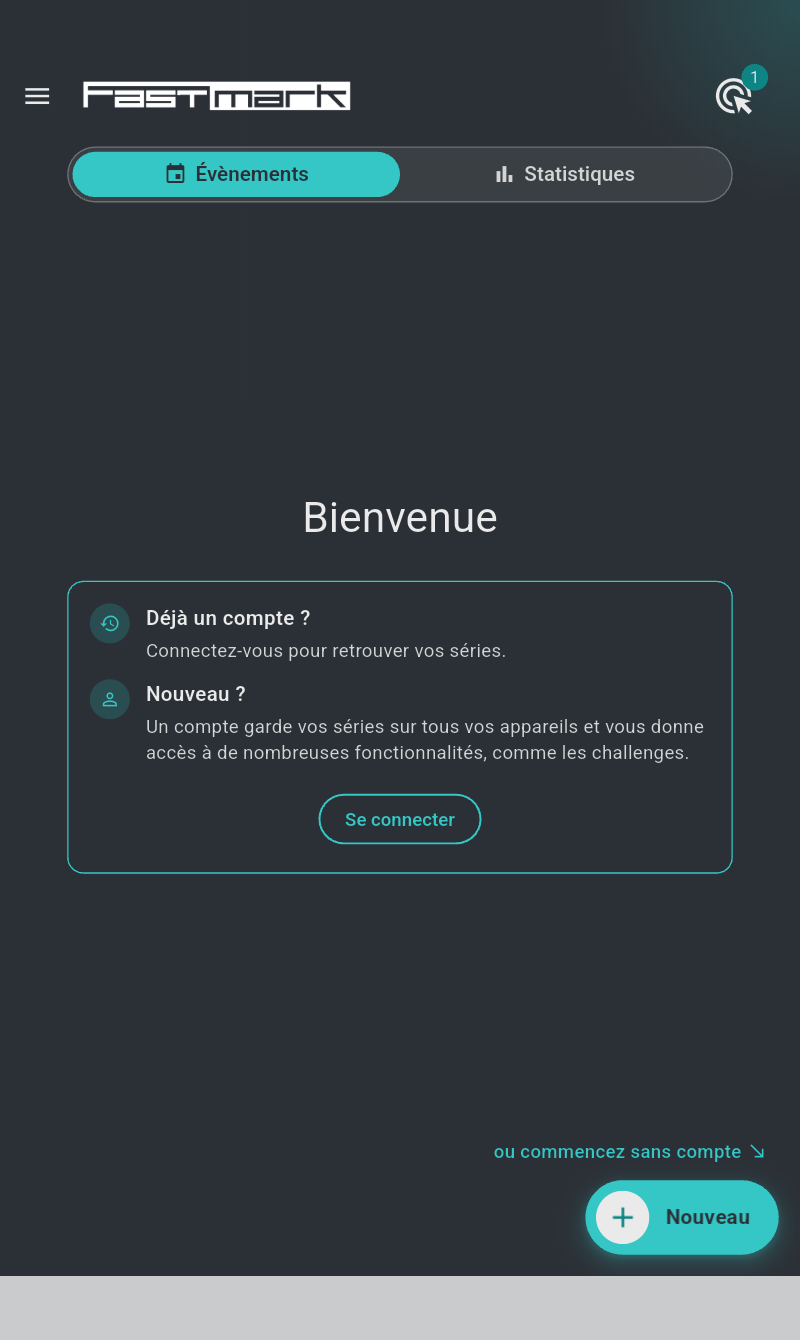
Le premier lancement nécessite une connexion internet car l'application crée son profil d'appareil privé et télécharge les modèles de tir officiels ; cela prend quelques secondes, puis l'écran d'accueil est prêt. Pendant le chargement, l'écran d'accueil est affiché grisé avec un indicateur d'attente. Les lancements suivants sont plus rapides et fonctionnent hors ligne.
Trois situations peuvent empêcher le premier lancement d'aboutir :
- "Nouvelle version disponible" — votre application installée est plus ancienne que la version minimale acceptée par le service. L'écran affiche "Merci de bien vouloir faire la mise à jour depuis le store" : mettez l'application à jour depuis le store.
- Pas d'internet au tout premier lancement — l'écran affiche "Vous devez être connecté à internet pour la première initialisation de l'application" et l'application réessaie toutes les 3 secondes jusqu'à ce qu'une connexion soit disponible. Connectez-vous à internet et le démarrage se termine de lui-même.
- "La configuration a changé. Veuillez fermer et redémarrer l'application." — la configuration du service a été mise à jour pendant que l'application tournait. Fermez complètement l'application et rouvrez-la.
Vous n'avez pas besoin de créer un compte pour utiliser l'application : elle démarre sur un profil d'appareil privé et tout ce qui est décrit dans ce manuel jusqu'au chapitre 4 fonctionne sans se connecter. Tant que vous n'êtes pas connecté, l'écran d'accueil vous accueille avec "Bienvenue" et une carte qui dit "Déjà un compte ?" — "Connectez-vous pour retrouver vos séries." — et "Nouveau ?" — "Un compte garde vos séries sur tous vos appareils et vous donne accès à de nombreuses fonctionnalités, comme les challenges." — avec un bouton "Se connecter". En bas à droite, "ou commencez sans compte" pointe vers le bouton "Nouveau" : touchez-le et tirez tout de suite. La connexion ajoute la synchronisation entre appareils, le partage et les challenges — voir le chapitre 4.
Occasionnellement, Fastmark publie un message de service : il s'ouvre au démarrage sous la forme d'un panneau intitulé "Fastmark", que l'on ferme avec "Compris".
1.4 L'écran d'accueil¶
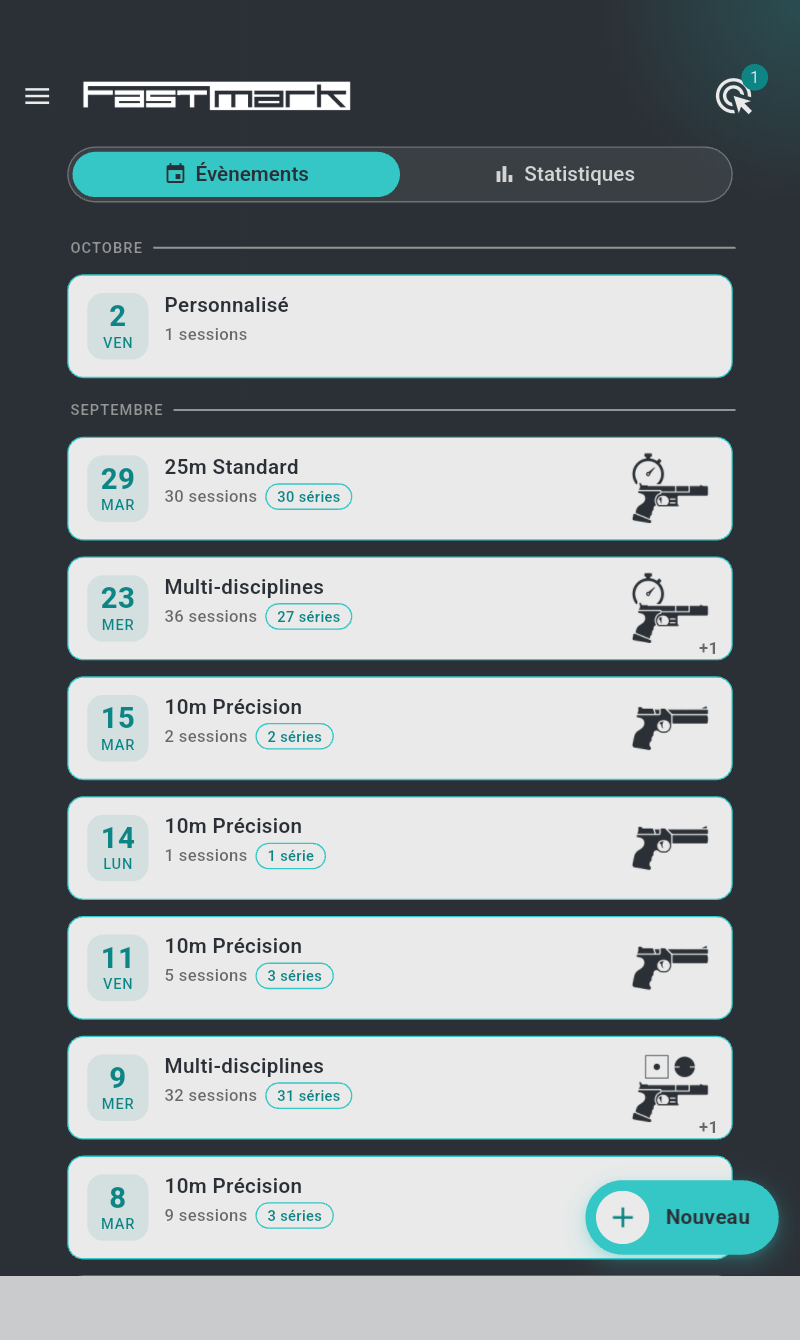
De haut en bas :
- Barre d'application — l'icône de menu à gauche, le logo Fastmark, et à droite le bouton cibles (une icône en forme de cible) avec un badge compteur indiquant combien de cibles l'application voit actuellement. Le badge est masqué et l'icône grisée tant qu'aucune cible n'est en vue. Le toucher liste les cibles découvertes (voir le chapitre 3). Quand le Bluetooth est désactivé ou que son autorisation manque, le bouton devient une icône Bluetooth barré — touchez-la pour corriger le problème sur place (§11.2).
- Deux onglets — "Évènements" (icône calendrier) listant vos journées de tir, et "Statistiques" (icône graphique) montrant votre progression par discipline (chapitre 8).
-
La liste des évènements — du plus récent au plus ancien, regroupés par mois : un en-tête de mois pour l'année en cours (OCTOBRE), mois et année pour les années précédentes (SEPTEMBRE 2025). Chaque évènement est une tuile :
- une feuille de calendrier à gauche avec le numéro du jour au-dessus du jour de la semaine — la feuille du jour est remplie en sombre ;
- le titre : le nom de l'évènement, ou — quand l'évènement porte encore son nom de date par défaut — la discipline qui y a été tirée ("Personnalisé" s'il ne contient que des sessions personnalisées, "Multi-disciplines" si plusieurs disciplines ont été tirées) ;
- une seconde ligne avec le compteur "{} sessions", suivi de puces comptant ses sessions officielles : "{} match" / "{} matchs" et "{} série" / "{} séries" ;
- à droite, le pictogramme de la discipline la plus tirée, avec une marque +n quand d'autres disciplines ont été tirées dans le même évènement.
Les évènements appartenant à un autre compte apparaissent avec une tuile lavande et un badge sur la feuille : une coupe pour un challenge (chapitre 12), une personne pour un évènement partagé avec vous.
-
Le bouton "Nouveau" (en bas à droite, un + avec le libellé "Nouveau") — crée une nouvelle session (chapitre 5). Quand vous êtes connecté mais n'avez encore aucun évènement, la liste vide affiche "Démarrez une nouvelle session avec Nouveau".
Sur un écran large (tablette en paysage, 840 px ou plus), le menu est affiché en permanence dans un panneau à gauche et l'icône de menu disparaît.
1.5 Le menu¶
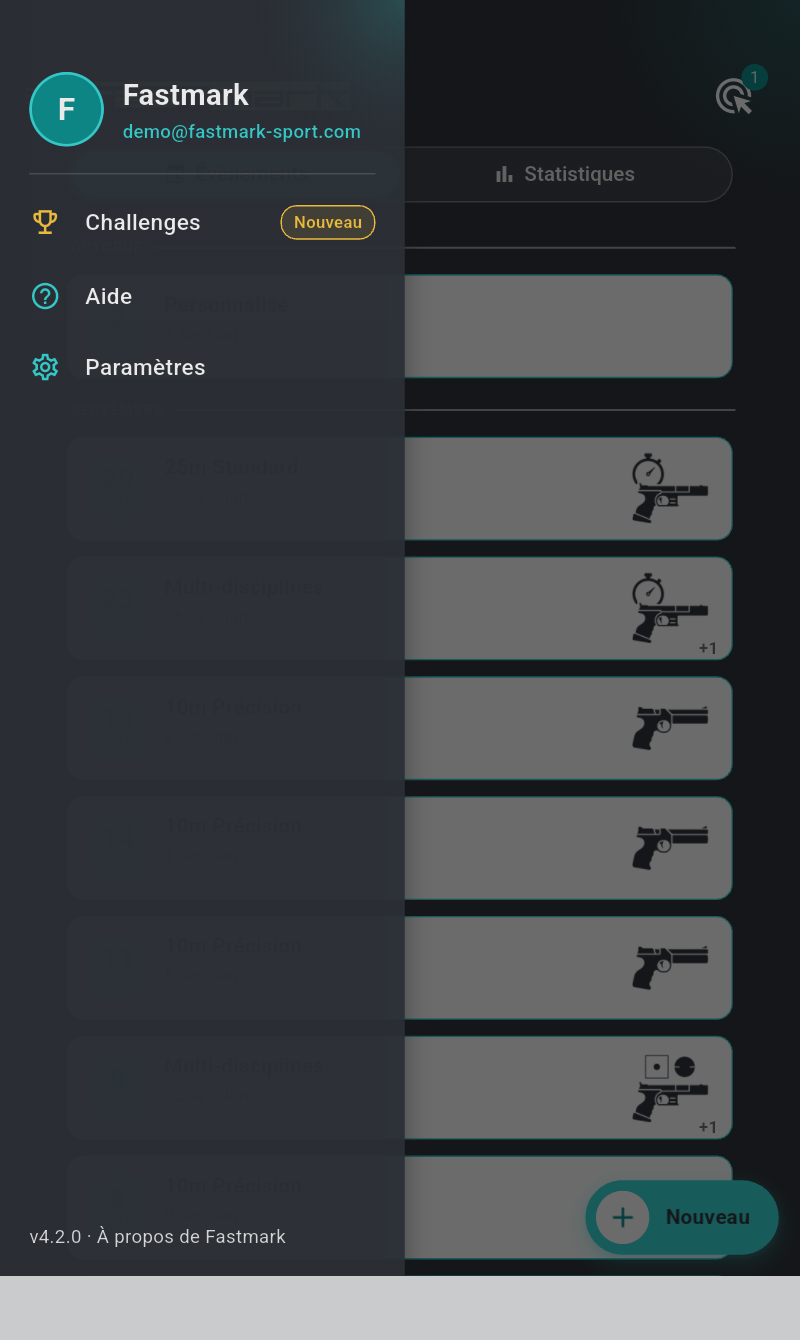
Le menu est le panneau latéral de l'application : glissez vers la droite depuis le bord gauche, ou touchez l'icône de menu en haut à gauche de la barre d'application. Touchez n'importe où en dehors du panneau pour le fermer. De haut en bas :
| Entrée | Ouvre |
|---|---|
| Votre bloc d'identité — un disque avec votre initiale, votre nom d'utilisateur, et en dessous votre adresse e-mail quand vous êtes connecté ou "Non connecté · Se connecter" sinon | La page utilisateur — compte, connexion, statut superviseur (chapitre 4) |
| "Challenges" (icône coupe dorée, avec un badge "Nouveau") — affiché uniquement tant qu'au moins un challenge vous est ouvert | La page des challenges (chapitre 12) |
| "Aide" | La page d'aide : un lien vers ce manuel et le dépannage guidé de la cible (§11.9) |
| "Paramètres" | La page des paramètres (chapitre 10) |
| "v4.2.0 · À propos de Fastmark" (pied de page, avec la version installée) | La version de l'application et les informations de licence |
1.6 Votre première session, pas à pas¶
- Allumez la cible — pressez son interrupteur et maintenez-le jusqu'à ce que la LED s'allume (bleu atténué fixe). Détails au chapitre 2.
-
Ouvrez l'application. En quelques secondes, le badge compteur du bouton cibles affiche 1.

-
Touchez "Nouveau" pour créer une session. L'onglet "Personnalisé" est sélectionné par défaut — c'est le tir libre, avec chaque paramètre réglable ("Choisissez librement chaque paramètre").
-
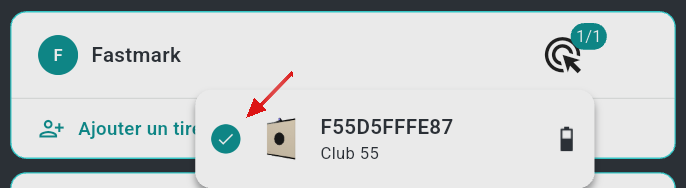
Dans la carte des tireurs, votre ligne affiche "Choisissez 1 cible" en orange. Touchez le badge de cible à sa droite et sélectionnez votre cible dans la liste qui s'ouvre. Le badge passe au bleu-vert (1/1) et l'avis disparaît.
-
Touchez le bouton "Lancer" (flèche de lecture). L'écran de tir en direct s'ouvre et la séquence démarre (chapitre 6).
- Tirez. Chaque impact apparaît sur le visuel en une fraction de seconde, avec son score.
- Touchez le bouton "Arrêter" quand vous avez terminé (ou laissez la minuterie s'écouler). Votre série est enregistrée automatiquement.
1.7 Où vivent les résultats¶
Tout ce que vous tirez est stocké immédiatement sur l'appareil et synchronisé en arrière-plan. Pour revoir une session passée : écran d'accueil → touchez l'évènement (la journée de tir) → touchez la session → touchez une série. Scores, positions d'impact, statistiques et notes sont tous conservés — voir le chapitre 7 et le chapitre 8.